
 Preparing your home for interior or exterior painting can streamline the paint job and make clean-up a breeze. Whether you are painting your home by yourself or hiring a professional, preparing your home for the painting project makes all the difference.
How to Prepare for a House Painting Project
- Prep the work area
- Clean and repair surfaces
- Prime
- Paint
- Clean-up
What You Need

- Paintbrushes
- Paint tray
- Small brush
- Long-handled brush
- Bucket
- Rags
- Drop cloths
- Painter’s tape
- Putty knife
- Ladder
- Pressure washer
- Protective goggles
- Trisodium phosphate (TSP)
- Bleach
- Fine-grit sandpaper
- Disc sander
- Edge scraper
- Paintable caulk
- Sponge/cloth
- Mild detergent
- Rubber gloves
- Protective clothing
- Screwdriver- flathead and phillips
- Caulking tool
- Spackling compound
- Exterior or interior paint
- Exterior or interior primer/sealer
Prepping the Work Area
If you will be painting indoors, remove the furniture from the space or move all of them toward the center of the room and cover them with drop cloths. To protect your floor from splashing paint, provide about three feet of cover from the wall or cover the entire floor if you will be painting the ceiling. Plastic requires tape to stay put and can reduce traction for ladder stability. Consider canvas drop cloths to protect your floor.Ensure a clean look by removing switch plates, outlet covers, fixtures, and window treatments. Clean the space’s moldings, window sills, or anything you do not want the paint to seep through, and apply painter’s tape.
A painter’s tape applicator can speed up the process. Press on the edge of the painter’s tape with a putty knife to ensure there is a proper seal. For ceiling paint jobs, use a lightweight plastic sheeting to protect your walls.
If you will be painting outdoors, cover shrubs, nearby cars, outdoor furniture, air conditioning units, and anything else you want to keep paint-free. Cover the ground with a drop cloth to protect your driveways, yard, and other hardscape elements.
Remove light fixtures, electrical covers, shutters, and any other obstacles. Use painter’s tape to tape around obstacles you cannot remove.
 Dirt and grime can prevent paint from adhering correctly to a surface. When working inside, use a mild detergent, water, and a cloth or sponge to wipe down walls. Let the walls dry before moving forward.
Cleaning and Repairing Surfaces
Dirt and grime can prevent paint from adhering correctly to a surface. When working inside, use a mild detergent, water, and a cloth or sponge to wipe down walls. Let the walls dry before moving forward.If you notice holes, cracks, or other flaws, apply a small amount of spackle with a putty knife. Before application, use the putty knife to remove the excess drywall around the crack or hole.
Allow the spackle to dry for a couple of hours before gently sanding it down with fine-grit sandpaper to create a uniform and smooth surface. Wipe down the area to remove dust.
If you are painting the house exterior, scrape off or sand down flaking or loose paint. Sand it with a large sander and finish the job with a disc sander. Start with coarse sandpaper and use a finer one to smooth away the surface.
Most homes built before 1978 have at least one coat of lead-based paint, with older homes having the most lead paint coatings. Use a lead paint testing kit to see if your paint has lead. Exposure can cause serious health issues, especially for children and pregnant women. Avoid scraping off the paint and practice safe methods when working with lead-based paint.
Surfaces can be cleaned with a cleaning solution of trisodium phosphate (TSP), water, and bleach using a long-handled brush.
When using TSP, follow the manufacturer’s instructions and wear protective clothing, goggles, and rubber gloves. Surfaces can then be sprayed with a power washer with a mild detergent or using a hose and a scrub brush. Allow the surface to dry before painting.
If painting lightly-chalking concrete and masonry, use a masonry surface conditioner to bond the surface so that the paint will adhere better.
Fix any holes, cracks, or damage to the surface using an exterior spackling compound and sand down smooth. Use paintable caulk to fill cracks and joints in window frames, trim, and similar areas.
Old caulk can be scraped off with a screwdriver or putty knife and cleaned with a small brush. Use a caulking tool to apply a paintable caulk.
Priming
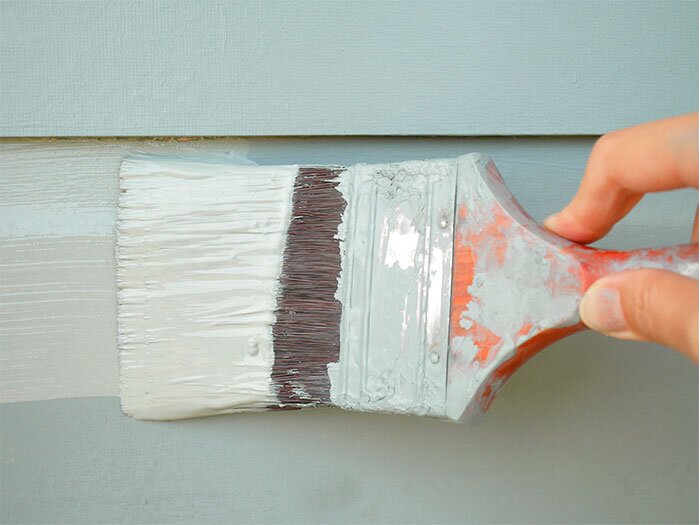
Applying a coat of primer for indoor paint projects can make your paint adhere better to the surface. Priming is a good option for stained walls or when using a lighter paint color over a darker one. Primer can be applied with a brush or roller. When painting or priming, open the windows to work in a well-ventilated environment.Coat your paintbrush bristles with about 1 inch of primer to paint in areas that the roller cannot reach, such as near doors, windows, fixtures, and corners. Apply the primer using a roller in 3-4 foot square sections. Paint widthwise using a pattern of overlapping “W” strokes from right to left, then left to right. Spread the primer evenly with vertical strokes and let the primer dry.
 When applying the new paint, assemble all your painting tools and follow the same procedure used for priming the surface. You do not need to let the paint dry before applying another coat, but the results will be better if you let it sit longer.
Paint
When applying the new paint, assemble all your painting tools and follow the same procedure used for priming the surface. You do not need to let the paint dry before applying another coat, but the results will be better if you let it sit longer.Cleanup
 After your home’s exterior or interior is painted, it is time to clean up. Carefully pick up drop cloths to ensure you do not get any paint on furniture, floors, or walls. Wipe away paint from the paint can grooves and seal the paint can to keep it from drying up.
Use a rubber mallet to ensure the can is properly sealed. A hammer can damage the lid but can work if you place a piece of wood to cover the can first. Store paint cans in a cool and dark space.
Paint can be dangerous to the environment if not disposed of correctly. Research requirements and restrictions for safe paint disposal or use safe disposal procedures for latex- and oil-based paint.
Clean your paintbrushes in a bucket of soapy and warm water. Dip the brushes in the water, remove paint with your fingers, and remove the excess water from the paintbrush. You can throw the paint tray liner in the garbage.
Remove the roller from the handle using a paper towel or gloves to keep your hands clean. Roller covers used with latex paint can be rinsed in soapy water, while oil-based paint covers require paint thinner. Rinse the covers thoroughly and use a roller spinner to remove excess liquid.
When you have to remove the painter’s tape, remove painter’s tape at a 45-degree angle to keep the edge of the fresh paint intact. Do not allow the fresh paint to completely dry. This can make removing the tape more difficult.
Allow the paint to dry completely before putting everything back in place.
After your home’s exterior or interior is painted, it is time to clean up. Carefully pick up drop cloths to ensure you do not get any paint on furniture, floors, or walls. Wipe away paint from the paint can grooves and seal the paint can to keep it from drying up.
Use a rubber mallet to ensure the can is properly sealed. A hammer can damage the lid but can work if you place a piece of wood to cover the can first. Store paint cans in a cool and dark space.
Paint can be dangerous to the environment if not disposed of correctly. Research requirements and restrictions for safe paint disposal or use safe disposal procedures for latex- and oil-based paint.
Clean your paintbrushes in a bucket of soapy and warm water. Dip the brushes in the water, remove paint with your fingers, and remove the excess water from the paintbrush. You can throw the paint tray liner in the garbage.
Remove the roller from the handle using a paper towel or gloves to keep your hands clean. Roller covers used with latex paint can be rinsed in soapy water, while oil-based paint covers require paint thinner. Rinse the covers thoroughly and use a roller spinner to remove excess liquid.
When you have to remove the painter’s tape, remove painter’s tape at a 45-degree angle to keep the edge of the fresh paint intact. Do not allow the fresh paint to completely dry. This can make removing the tape more difficult.
Allow the paint to dry completely before putting everything back in place.
Shop Interior and Exterior Painting Supplies at Wilco Farm Stores
For all your house painting projects, shop at Wilco Farm Stores. We carry a wide range of paint prep supplies so that you can complete your project affordably and quickly. Make that fresh coat of paint pop with the help of Wilco Farm Stores.Orders
Services
About
Your Wilco Store

Store Hours
Monday - Saturday 7am - 8pm, Sunday 9am - 6pm

Need Help?
For questions or help with online orders call: (888) 78-WILCO
Limited to stock on hand. Some items may vary from photos. Because of store size limitations or geography, some items featured may not be available in all stores but will be made available by special order during sale periods at advertised prices. All sale prices listed as “dollars off” or “% off” are discounted from our regular posted shelf price, not from discounts given with specialty, bulk or pallet pricing. Reseller and Drop-shippers must contact us for pre-approval to place orders with the intent to re-distribute.
© 2026, Wilco Farm Store