Shopping at Pasco - Monday - Saturday 7am - 8pm, Sunday 9am - 6pm
PascoMonday - Saturday 7am - 8pm, Sunday 9am - 6pm

Installing a T-Post Fence: Tools, Strategies, and Pitfalls
February 14, 2024
Hardware, Paint & Home
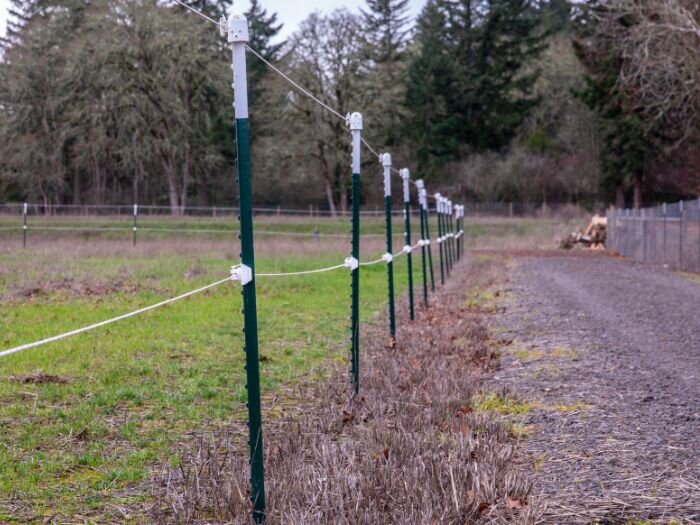
 A sturdy T-Post fence is more than just a boundary for your property, it's a symbol of protection, security, and privacy. But to install a long-lasting, sturdy T-post fence, you’ll need to gather the essential tools and materials and understand how to navigate the unique challenges of your terrain.
So let's roll up our sleeves and dive into the world of T-post fencing.
A sturdy T-Post fence is more than just a boundary for your property, it's a symbol of protection, security, and privacy. But to install a long-lasting, sturdy T-post fence, you’ll need to gather the essential tools and materials and understand how to navigate the unique challenges of your terrain.
So let's roll up our sleeves and dive into the world of T-post fencing.
Tools and Materials
 First, here are all of the necessary tools and materials for installing a T-post fence.
Essential Tools
Tape measure: Accurate measurements are the foundation of a sturdy and reliable fence. You'll need a tape measure to determine the distance between T-posts and to ensure the fence line is even.Post rammer: Also known as a post driver, this tool is essential for driving your T-posts into the ground. It's designed to make the job easier and faster, saving you time and energy.
String: The string helps maintain a straight and true fence line. It's also useful for marking where the posts will go before you start hammering them in.
Spirit level: This tool ensures that your T-posts are perfectly vertical once installed. An uneven post can lead to a weak fence, so it's important to check every post with a spirit level.
Materials
T-posts: The number of T-posts required depends on the length of your fence and the spacing between each post.Fence panels: Choose panels based on the purpose of your fence.
- Wire mesh: Ideal for smaller animals or as a garden fence.
- Welded wire fencing: Larger grid patterns, suitable for larger animals.
- Barbed wire: Common for livestock control.
- Electric fencing: Often combined with T-posts for effective livestock containment.
- Plastic or vinyl fencing: A lightweight option for specific needs like decorative garden enclosures.
- Wire mesh and welded wire fencing: Use wire clips or U-nails to attach these to T-posts.
- Barbed wire: Barbed wire clips or wire twists are typically used to attach barbed wire to T-posts.
- Electric fencing: Specialized insulators are available that can be clipped or nailed to T-posts, ensuring that the electric wire is held securely without grounding the current.
- Plastic or vinyl fencing: Depending on the design, you might use specific clips designed for vinyl fencing, or you might need to secure the fencing to a frame that can then be attached to the T-posts.
Planning and Preparation
 Every good fence starts with a solid plan, so take the time to prepare and measure twice. With careful planning and preparation, you'll have a sturdy, straight, and aesthetically pleasing T-post fence.
Start by deciding the path of your fence.
Consider any obstacles in its way, like trees or buildings, and plan accordingly. Using stakes and string can help visualize the line and make adjustments as needed. Just remember, a straight fence line not only looks good but also provides the best support for your wire mesh panels.Align your posts to create stability for your fence.
T-posts should be spaced evenly apart, usually around 6 to 8 feet. Even spacing between your posts contributes to the strength and longevity of your fence. Uneven or too wide spacing can lead to sagging or weak spots. However, this may vary depending on the type of panels you are using and the purpose of the fence. A tape measure will be your best friend to create accurate spacing between each post. Read Fencing Tips and Strategies for more fence planning ideas.Step-by-Step T-Post Installation Guide
 Follow these steps to install your T-post fence:
Step 1: Set corner and end posts
These posts bear more weight and stress than the other posts, so they need to be well-secured with cement.- Dig a hole approximately 3 times the width of the post and deep enough that one-third of the post will be underground.
- Position your post in the hole and use a spirit level to ensure it's straight.
- Pour concrete into the hole until it's about two inches from the top. Allow the concrete to cure based on the manufacturer's instructions.
Step 2: Line up and position the T-posts
Next, line up your T-posts along the planned fence line.- Use your tape measure to maintain even spacing between each post (around 6 to 8 feet apart).
- The flat side of the T-post should face the area you're fencing in. This placement makes attaching your panels easier and more secure.
Step 3: Mark your post positions
- Mark where each T-post will go with a stake or spray paint.
- Ensure that the marks align with your string line for a straight fence.
Step 4: Install the T-posts
Now it's time to drive in the T-posts.- Place the post rammer over the top of the post and lift it up and down until the post is driven into the ground to the desired depth.
- Check each post with a spirit level to ensure it's vertical.
Step 5: Attach panels
- Attach your panels to the T-posts using the correct ties. Make sure the panels are taut and secure.
- Start at one end and work your way to the other end, checking the tension as you go.
Steps 6 to 8: Adapt to specific needs and conditions
These steps would vary depending on your specific fencing needs and the ground conditions. You might need to add additional support for gate posts, use cement for posts in loose soil, or make adjustments for uneven terrain. Read on to find out how to adjust your installation process should you encounter any of these challenges.Adapting to Challenges
 Fence installation isn't always a straightforward process, especially when dealing with hard or stony ground and uneven terrain.
Here are some strategies and tips to overcome these challenges.
Fence installation isn't always a straightforward process, especially when dealing with hard or stony ground and uneven terrain.
Here are some strategies and tips to overcome these challenges.
For hard or stony ground
When dealing with hard ground while installing a T-post fence, consider these tips:- Water the ground: If possible, soak the area with water a day before installation. This can soften the soil, making it easier to drive in the posts.
- Create pilot holes: Use a drill or dig bar to create pilot holes for the posts. This reduces the resistance when driving them into the ground.
- Use a post-hole digger: For particularly tough spots, a post-hole digger or auger can help create openings for your T-posts.
- Heat the posts: In extremely hard or frozen ground, heating the end of the T-posts can make it easier to drive into the ground.
- Hire professional equipment: For very challenging terrain, consider hiring professional-grade equipment like a pneumatic post driver.
For uneven terrain
Dealing with uneven terrain when installing a T-post fence requires a bit of extra attention and care. Here are some tips:- Use a line level: Use a line level on your string line to make sure your posts are aligned.
- Adjust post lengths: In areas with dips or rises, you may need to use longer or shorter posts to keep the fence line level.
- Use gradual angles: When dealing with slopes, consider angling your fence slightly to follow the contour of the land. This can provide a more natural and stable installation.
- Use the Step-Down Method: For steeper slopes, this involves installing sections of fencing at different heights, and stepping down with the slope.
For soft ground
When dealing with soft ground during T-post fence installation, here are a few more tips:- Enlarge the holes: Dig wider holes for the T-posts to provide more soil support.
- Use concrete: Secure the posts with concrete, especially at corners and gate areas where stability is crucial.
- Add gravel for drainage: Before setting the posts, add gravel at the bottom of the holes to improve drainage and prevent water from softening the ground further.
- Double-up posts: In extremely soft areas, consider using two posts side by side for added strength.
Installing without a T-post driver
If you don't have a T-post driver for your fencing project, here are some alternative methods:- Use a heavy hammer or sledgehammer: This can be effective, though it requires more effort and care to keep the post straight.
- Create a DIY driver: If you have a sturdy pipe and metal cap, you can create a makeshift post driver. Make sure it fits over the top of your T-post.
- Rent or borrow tools: Sometimes, renting a manual or pneumatic post driver can be a cost-effective solution.
Maintenance and Longevity
 A well-maintained fence will not only look good, but it will also last longer and perform better. Here are some recommendations for maintaining your fence and extending its life.
Regular inspection
Regularly inspect your fence for signs of damage, such as bent or loose posts, rust, or broken wire mesh. Early detection of these issues can prevent further deterioration and reduce repair costs. Pay particular attention to corner and gate posts, which bear more weight and are more susceptible to damage.Repair damages promptly
If you notice any damage during your inspections, take immediate action to repair it. Replace damaged posts and tighten any loose wire mesh. It's a good idea to keep some spare parts on hand for quick repairs.Control vegetation
Overgrown vegetation can put pressure on your fence and cause it to lean or even collapse. Regularly trim back any plants growing near your fence. Be particularly mindful of vines, which can grow quickly and weigh down your fence.Protect against rust
If your fence is made of metal, you should take steps to prevent rust. This might involve regularly painting your fence with a rust-resistant coating or installing caps on your posts to prevent water from getting inside.Consider the soil type
The type of soil in which your fence is installed can affect its longevity. For instance, posts installed in very sandy or wet soil may not be as stable and may require additional reinforcement. If you notice that your posts are leaning or unstable, you may need to use concrete or a post-fixing mix to secure them.Securing Your Space with a Well-Installed T-Post Fence
 Whether protecting a garden, containing livestock, or simply defining your property, by following these steps, you'll have a well-installed, sturdy, and reliable T-post fence ready to serve its purpose.
Remember, patience and precision are key during installation. Happy fencing!
Whether protecting a garden, containing livestock, or simply defining your property, by following these steps, you'll have a well-installed, sturdy, and reliable T-post fence ready to serve its purpose.
Remember, patience and precision are key during installation. Happy fencing!Orders
Services
About
Your Pasco Wilco Store

Store Hours
Monday - Saturday 7am - 8pm, Sunday 9am - 6pm

Need Help?
For questions or help with online orders call: (888) 78-WILCO
Limited to stock on hand. Some items may vary from photos. Because of store size limitations or geography, some items featured may not be available in all stores but will be made available by special order during sale periods at advertised prices. All sale prices listed as “dollars off” or “% off” are discounted from our regular posted shelf price, not from discounts given with specialty, bulk or pallet pricing. Reseller and Drop-shippers must contact us for pre-approval to place orders with the intent to re-distribute.
© 2026, Wilco Farm Store