Shopping at Pasco - Monday - Saturday 7am - 8pm, Sunday 9am - 6pm
PascoMonday - Saturday 7am - 8pm, Sunday 9am - 6pm

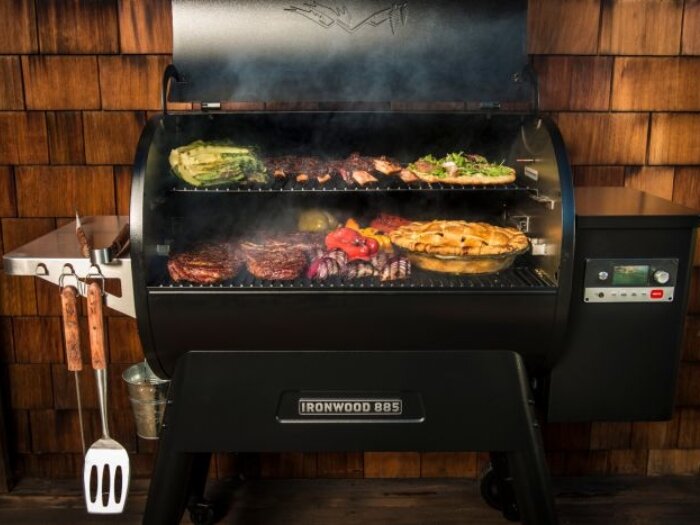
Keeping Your Traeger Grill in Tip-Top Shape: A Comprehensive Guide
May 17, 2023
BBQ, Canning & Recipes
 Ah, the great outdoors! A place where friends and family gather to create cherished memories and, of course, indulge in some mouthwatering meals cooked on a Traeger grill. To keep those tasty BBQ moments coming, it’s crucial to give your grill the TLC it deserves.
In this comprehensive guide, we will provide all the information you need to know about cleaning and properly maintaining your Traeger so it's always ready for your next grilling adventure!
Ah, the great outdoors! A place where friends and family gather to create cherished memories and, of course, indulge in some mouthwatering meals cooked on a Traeger grill. To keep those tasty BBQ moments coming, it’s crucial to give your grill the TLC it deserves.
In this comprehensive guide, we will provide all the information you need to know about cleaning and properly maintaining your Traeger so it's always ready for your next grilling adventure!
Understanding Your Traeger - Grill Parts and Their Functionality
Whether you are a seasoned grill master or a newbie, getting to know the various parts of your Traeger pellet grill is essential to achieving the perfect cook every time. Each component, from the firepot, which ignites the pellets and creates the heat source, to the drip tray, which catches any excess grease or drippings from your food, plays a vital role in the overall performance of your grill. Knowing how to properly clean and maintain these parts can also extend the life of your Traeger and ensure that it continues to perform at its best. So, take some time to familiarize yourself with the anatomy of your Traeger and get ready to elevate your grilling game.Pellet Hopper
The pellet hopper is the main fuel storage for your grill, typically made from stainless steel or another durable material.Auger
The auger is a motorized screw that feeds pellets from the hopper to the fire pot. The auger is responsible for ensuring a consistent supply of pellets is available to the fire pot.Fire Pot
The fire pot is where the pellets are burned in order to generate heat. The fire pot is typically made from cast iron or another durable material.Igniter Rod
Like a trusty match, the igniter rod is responsible for igniting the pellets in the fire pot. The igniter rod is typically made from ceramic or another heat-resistant material.Grease Tray
The grease tray is responsible for catching any grease or other liquids that drip from the food as it cooks. The tray helps to keep the grill clean and can be easily removed for cleaning.Temperature Probe
The temperature probe is responsible for measuring the internal temperature of the grill. The probe can be used to set and monitor the temperature of the grill, ensuring that food is cooked evenly.Smokestack
The smokestack is your grill’s chimney, venting smoke and other fumes away from the cooking area, keeping them out of the way of the chef and food alike.Grill Grates
The Traeger grill grates are responsible for supporting the food as it cooks and also for distributing heat evenly across the surface of the food. Grill grates are typically made from stainless steel or another durable material.PID Controller
The PID controller, the brains of the operation, is an electronic device that regulates the temperature inside the grill by controlling the flow of pellets to the fire pot. The PID controller uses sensors to monitor the temperature inside the grill and adjusts the flow of pellets accordingly.Flavorizer Bars
The flavorizer bars are located below the grill grates and help to vaporize drippings, adding flavor and helping to prevent flare-ups. Flavorizer bars are typically made from stainless steel or another durable material.Heat Shield
The heat shield is a metal plate that helps to deflect heat away from the control panel and electronics of the grill. This helps to prevent premature wear and tear on these components and extends the life of the grill.The Heat Baffle/Diffuser Plate
This piece evenly distributes heat from the fire pot to all parts of the grill surface, ensuring the food cooks evenly on all sides.Cleaning & Protecting Your Traeger's Interior

Tools for the Job
Before diving into the cleaning process, let's review the tools and parts of your Traeger grill. You'll need a vacuum with a hose attachment, a grill brush or scraper, and a clean, damp cloth. You may also want to use a mild soap and warm water solution to remove stubborn stains or residue. You can also buy a specially formulated Traeger grill cleaner for those super tough jobs.Before starting, make sure to unplug the grill and allow it plenty of time to cool down, and dry the surface thoroughly before moving on to the next step.
Once your Traeger is cool and dry, apply a protective coating of vegetable oil or other food-grade oil to all internal surfaces. This will help protect the grill and make it easier to clean in the future. Your Traeger grill cleaner or another grill cleaner will work wonders at removing stubborn build-up and keeping your Traeger looking like new.

Cleaning the Pellet Hopper
Cleaning the pellet hopper of a Traeger Grill is essential for proper functioning and to ensure optimal grilling performance. Signs that indicate it needs cleaning include smokey flames, inconsistent temperatures, unpredictable behavior when turning on/off, slow start-ups, and too much ash production. Before starting any cleaning, make sure to turn off the grill and disconnect it from any power sources.- Start by removing any remaining pellets or debris from the pellet hopper using gloved hands.
- Next, use a shop vac to carefully vacuum all hopper components, including its sides, top, bottom, and inlets.
- Wipe down the interior with a damp cloth and make sure no residue is left behind.
- Conduct a final visual inspection to check for any signs of visible dirt or dust inside the hopper.
Cleaning the Auger
It is recommended you clean the auger after every 5 to 10 uses, depending on how often you use your grill. Any accumulated debris in the auger could cause it to malfunction, so this is a vital task.- To start, remove the hopper lid and empty any remaining pellets into a bucket.
- Next, remove the screws that hold the motor in place and gently slide the motor out of the way. You should now be able to see the auger, which resembles a long metal screw.
- Using your vacuum with the hose attachment, carefully remove any debris from the auger.
- Once finished, use a grill brush or scraper to gently remove any remaining debris from the auger. Be sure to be gentle and not damage any parts.
- Wipe down the auger with a clean, damp cloth to remove any remaining dirt or dust, and thoroughly clean the motor.
Cleaning the Fire Pot
While you have the hopper lid off, use a small brush or vacuum accessory with a hose attachment to remove debris from inside the firepot. Be sure to clean both the interior and exterior surfaces. For those tougher jobs, scrub away any caked-on residue with a brass-bristle brush. Wipe the inside of the firepot with a damp cloth and then dry it off thoroughly with a lint-free cloth.Cleaning the Igniter Rod
Leaving everything disassembled, you should now be able to see the igniter rod connected to a sparker.- Grab a damp cloth and carefully wipe away any residue from both sides of the igniter rod without damaging its wiring or components.
- Make sure to also clean around its connections on either side as well as any other metallic parts within its vicinity using a brass brush or steel wool pad if necessary. You can also use electrical parts contact cleaner for this. Once you've finished cleaning the igniter rod, dry it off completely and replace the AA batteries. You don't want to put this all back together and realize the batteries are dead!
Cleaning the Grease Tray/Drip Bucket
 The grease tray is easy to access, especially with the firebox and pellets removed. Throw away any residue inside and around it before using a damp cloth or heavy paper towel like a shop towel to wipe its surfaces completely. A brass-bristle brush can be used for difficult stains or tough build-up on its side. Replace your drip bucket every 3 months or as needed. For an even more streamlined drip bucket and tray cleaning process, consider purchasing one of Traeger’s disposable drip bucket liners or drip tray liners, which come in a variety of sizes tailored to your particular series.
Regular Maintenance
Heat Regulation & Burner Performance
Maintaining your grill's heat regulation and burner performance is crucial to your Traeger's performance. One key aspect of this is keeping your grill grates and burners clean and free from buildup, as it can negatively affect both heat distribution and the performance of your burners. Additionally, regularly checking the fuel levels and ensuring proper connections between parts can prevent any mishaps during the cooking process.- Check the hopper vents after every use, and clear any debris that may have accumulated
- Brush off debris from outside of your grill after each use
- Inspect hoses and knobs for signs of wear or damage
- Get your Traeger inspected by an authorized service center every 6 months or as needed
Storing Your Grill - How to Preserve Your Traeger's Integrity During Off-Seasons
 The beauty of the Traeger is there is no off-season. But there may be times when it is covered in 6 feet of snow, making grilling slightly more difficult than normal. In those dark times, it is crucial to store and protect your grill so it is ready to go at the first sign of a thaw.
First and foremost, empty out any remaining pellets inside the hopper lid and throw away any residue found around it. Follow the cleaning instructions above for details.
Next, detach all removable parts of your Traeger Grill, including wheels and cooking grates, when putting it away for storage. These items may be damaged by cold temperatures or precipitation if left connected. Don't forget to remove the AA batteries - this will help prevent flat batteries when the grilling season returns!
Finally, cover your grill and pat it lovingly. Let it know you will be back soon and that this isn't goodbye, just goodbye for now. The cover will help protect it from rain, snow, and other elements that could cause harm (the reassuring words are, let's face it, mostly for you). Gently wheel it into a shed or garage, or under an awning for some additional protection.
The beauty of the Traeger is there is no off-season. But there may be times when it is covered in 6 feet of snow, making grilling slightly more difficult than normal. In those dark times, it is crucial to store and protect your grill so it is ready to go at the first sign of a thaw.
First and foremost, empty out any remaining pellets inside the hopper lid and throw away any residue found around it. Follow the cleaning instructions above for details.
Next, detach all removable parts of your Traeger Grill, including wheels and cooking grates, when putting it away for storage. These items may be damaged by cold temperatures or precipitation if left connected. Don't forget to remove the AA batteries - this will help prevent flat batteries when the grilling season returns!
Finally, cover your grill and pat it lovingly. Let it know you will be back soon and that this isn't goodbye, just goodbye for now. The cover will help protect it from rain, snow, and other elements that could cause harm (the reassuring words are, let's face it, mostly for you). Gently wheel it into a shed or garage, or under an awning for some additional protection.
Repair: When to Replace Worn-Out Components
Maintaining your Traeger grill can be an intricate process, but it should not be a daunting task. Knowing the right parts and tools required to keep your grill running smoothly is key. Generally, Traeger grills require replacement or additional parts such as grates, smoke probes, and drip pans. You can identify which parts you need by researching the issue at hand or referring to the part list in your manual. When looking for authorized dealers to order these parts from, make sure that they offer original Traeger products. This is important as non-genuine parts could damage your grill. Once you have identified the required part number, placing an order is simple. Locate a reputable dealer who offers reasonable prices and fast delivery timelines. Make sure to keep cost details like shipping charges in mind when making your purchase decision, and confirm that they provide hassle-free returns or exchanges if needed. Additionally, performing regular maintenance of your Traeger grill by following steps such as cleaning out ashes regularly and lubricating moving components with food-safe oil will help prolong its performance and longevity.Savor the Flavor with a Well-Maintained Traeger
Maintaining your Traeger grill is essential to getting the most out of it. Keeping all parts clean, replacing worn or damaged pieces, and properly storing the grill during off-seasons will help you enjoy many years of delicious barbecuing with your Traeger. With a bit of effort and dedication, you can guarantee your Traeger performs reliably for as long as possible - making every cookout a success! Happy grilling!Orders
Services
About
Your Pasco Wilco Store

Store Hours
Monday - Saturday 7am - 8pm, Sunday 9am - 6pm

Need Help?
For questions or help with online orders call: (888) 78-WILCO
Limited to stock on hand. Some items may vary from photos. Because of store size limitations or geography, some items featured may not be available in all stores but will be made available by special order during sale periods at advertised prices. All sale prices listed as “dollars off” or “% off” are discounted from our regular posted shelf price, not from discounts given with specialty, bulk or pallet pricing. Reseller and Drop-shippers must contact us for pre-approval to place orders with the intent to re-distribute.
© 2026, Wilco Farm Store